This week I created a DIY printable potty chart for my toddler. He’s been a bit challenging when it comes to potty training so I thought a chart may help him with motivation. (Wish us luck!) Since I was making the potty chart anyway it occurred to me that there may be some other parents in our situation that would want to make a custom printable potty chart. I’m hoping this post helps some of you to create your own DIY potty chart. (I wish I could help you with the potty training part as well but, well, I don’t seem to be an expert at that!)

Materials List
Here are the materials you’ll need to create this DIY Printable Potty Chart for your Toddler or Baby:
- Access to a computer with Microsoft Powerpoint
- Printer
- Laminator and sheets
- If you don’t have a laminator you can use this self-laminating sheets
- Command strips
- Dry erase marker
1. Open Powerpoint and Name File
Open Microsoft Powerpoint and start a blank presentation. Then, click file, save as and select a filename and location to save your file. It’s a good practice to do this right away so you can regularly save your work and not lose anything.
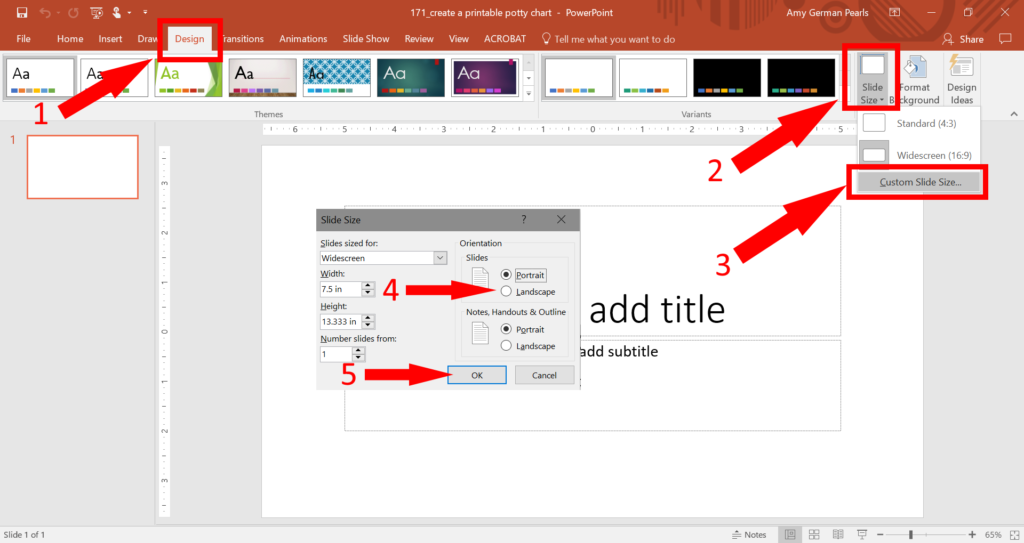
I want my potty chart to printed out portrait (so it prints out with the narrow side at the top instead of the wide side of the paper) so I need to change the page layout to portrait. Do this by going to the design menu, clicking size and then custom slide size. When the slide size dialog box opens select portrait under slide orientation. Select ok. You should now see that your printable is tall on your screen.
2. Add a Title
Even if you started with a blank presentation your page probably has a box that says click to add title and one that says click to add subtitle. In the one that says click to add title click on the box and add your own title, like “Potty Chart”.
You can then resize the box around the title by clicking on one of the corners and dragging it toward the center. Then click and drag the text box to the top of the page.
You can also change the font, font color and font size by clicking on the home menu and changing selections in the font section of that menu.
I didn’t want any more titles so I clicked on the box around the subtitle area and pressed delete on the keyboard to remove it.
3. Add a Table
For potty training we’re having our little guy sit on the potty after every meal. So, I’m going to set up a weekly potty training chart that has a spot to check off after each meal and an extra spot for a bonus in case he does very well one day.
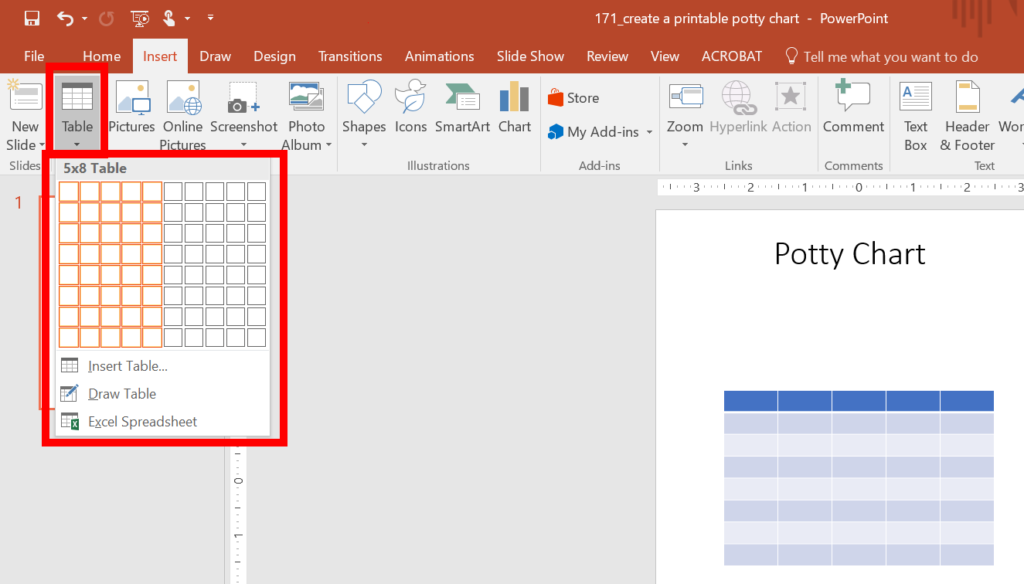
So, my chart will need 8 rows (one for each day of the week and one for the title at the top) and 5 columns (one for checking off after each meal, one for a bonus sticker and one for the titles at the left). To add the chart, click table from the insert menu. Drag the mouse over the squares until the table is the size you want (for mine I dragged the mous so 5 columns and 8 rows were highlighted). When the table is the right size for your printable potty chart, click your mouse and the table will be added to your layout.
Next enter the names for the rows and columns.
Powerpoint has some pre-formatted table styles you can use to quickly give your table a nicer look. You can see these styles by going to the design menu and scrolling through the table styles. To use one of these styles, click the outer edge of the table and then select the style you like from this menu. If you’re not sure which style you like, you can change the style of your chart by clicking on different ones until you find one you’re happy with.
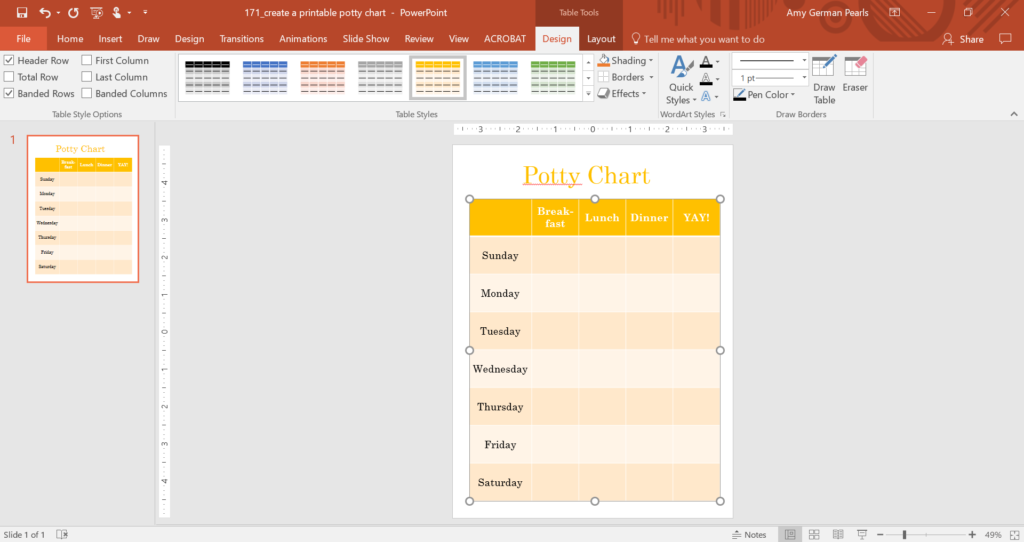
Again, change the font to whatever you’d like by using the font section of the home menu. By clicking on the outer edge of the table you can select the entire table at once. Then, if you change the font type, size, color, etc. the fonts for the entire table will change.
4. Decorate and Style the Printable Potty Chart
To make the printable potty chart a little cuter I found a cute image online I could add to the top. You can add more pictures if you like.
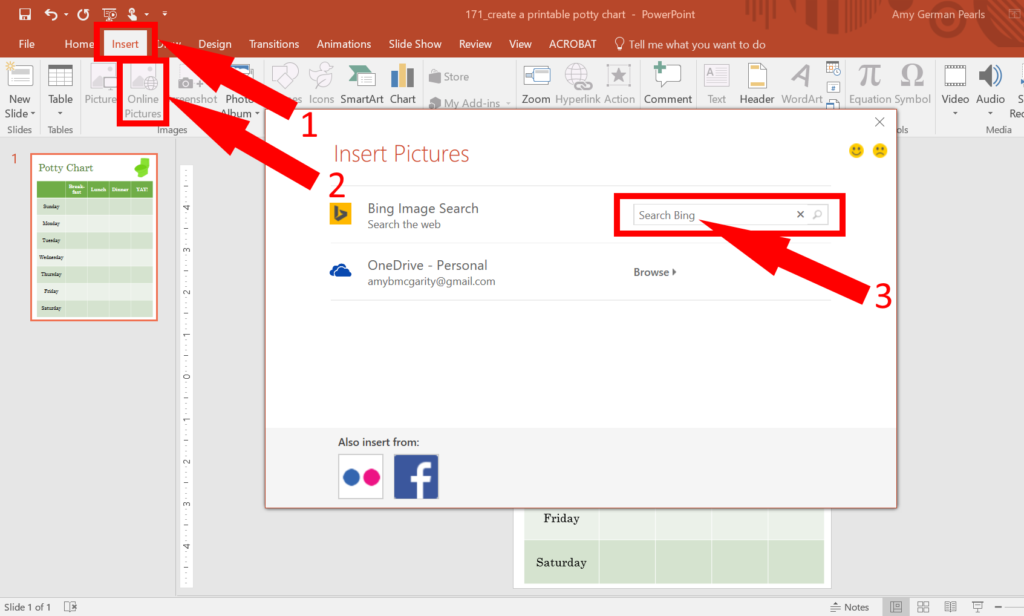
To add a picture go to the insert menu and click online images under the insert pictures section. In the box that opens type a word to search in the bing search bar and hit enter. When the images appear click on one your like and click insert.
After you’ve added your image(s) to your potty chart you can drag the different elements (ie: chart, pictures, title, etc) around on the screen by clicking and dragging them. You can also change the size of the different items by clicking on the item and, when a dashed box surrounds the item, click and drag the corner of the dashed box to resize it. This will work on the title, chart and image(s).
5. Print and Laminate your Potty Chart
When you’re happy with your layout print it out and laminate it. I use this inexpensive laminator from amazon with these refills for projects like this. If you don’t have a laminator you can also use these self-laminating sheets.
Mount your laminated potty chart to the wall or door of the bathroom using these command strips so you can easily remove it once your toddler is potty trained (hopefully quickly). Then, attach a whiteboard marker like this one to the chart. Have your toddler draw an x, a happy face or color in the square after he/she has sat on the potty or done his/her business. The great part about this laminated printable potty chart is that you can wipe off the marker and reuse it each week.
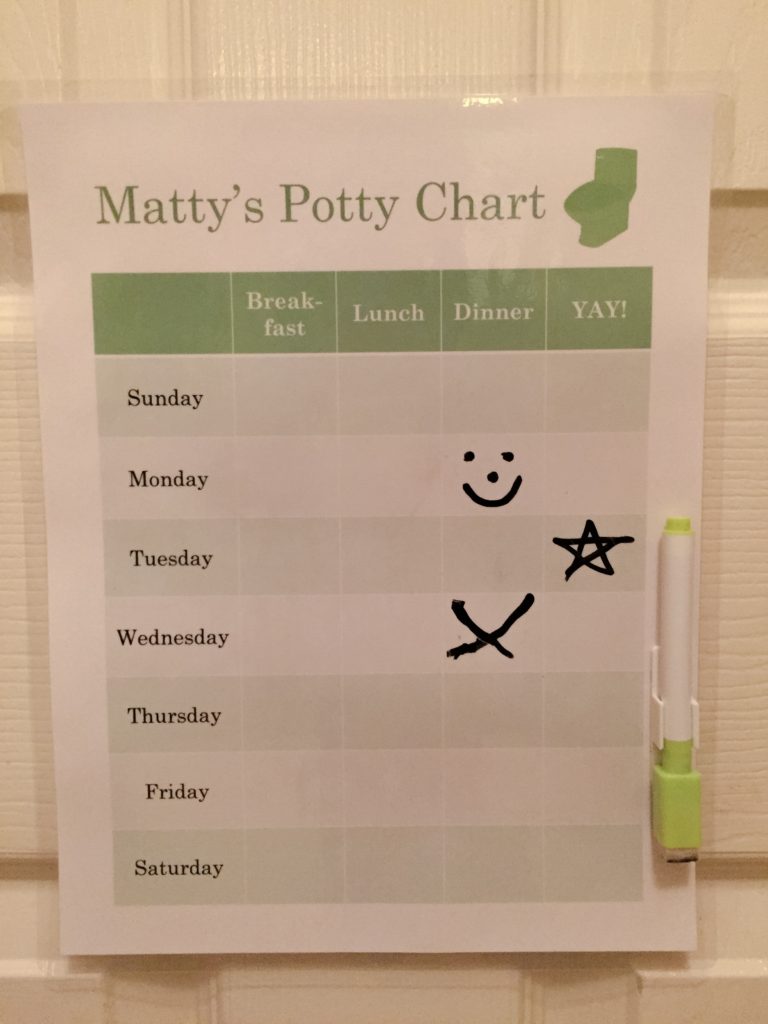
Good luck with your DIY printable potty chart and I wish you better luck on potty training!! After you make yours I’d love to see what you came up with. Leave a picture in the comments below – I’m sure it will help others get ideas as well. 🙂
Thanks for sharing these nice printable idea.
Jasmine recently posted…Should Parents Use Bribes or Rewards For Potty Training
You’re welcome! 🙂