Learn how to customize your Windows 10 start menu. With an organized start menu on your computer you have quick access to your favorite apps, programs and internet shortcuts. In this article we’ll show you a step by step way to organize your start menu in Windows 10. With an organized menu you’ll come to love the new tiles in Windows 10.
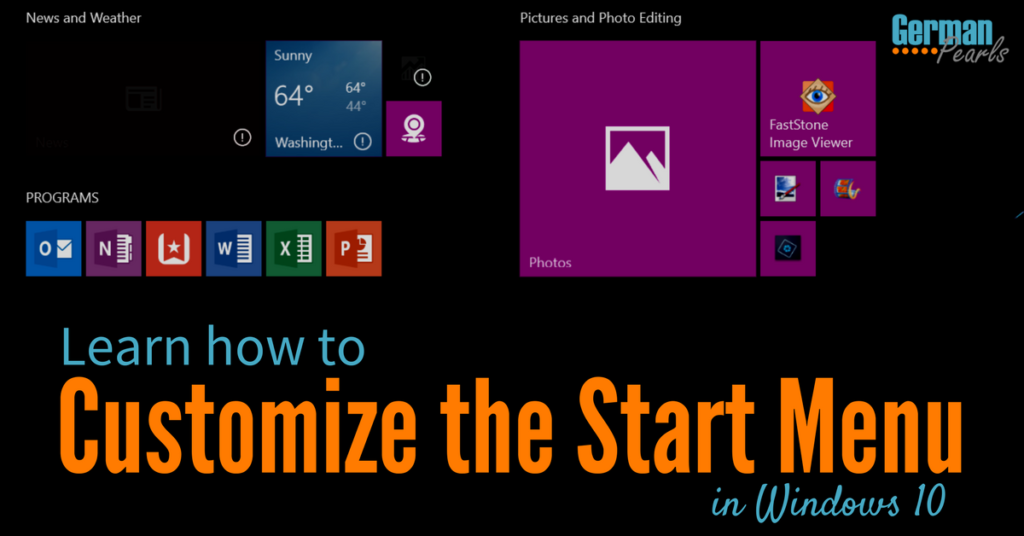
How to Customize Windows 10 Start Menu
In Windows 8 Microsoft introduced a new type of menu. This menu, in Windows 8, was called the start screen. In previous posts we talked about how to organize the Windows 8 start screen to make it more efficient. But, users were clearly frustrated with the Windows 8 start screen and lack of a start menu. Users were so upset about that software was developed by third parties to allow users to get their start menu back!
Windows 10’s start menu combines features of the historical Windows start menu and the Windows 8 start screen into one.
Windows 10 Tiles
So, what was it about the Windows 8 start screen that was added to the start menu? The tiles. Think of tiles as the icons on your phone’s screen. Or, the apps on your tablet.
So, the Windows 10 start menu now contains:
- at the far left, icons to change users, power off, open file explorer and adjust settings
- to the right of this settings column is the start menu you may remember from previous versions of Windows
- this menu may look slightly different as there are small icons next to each option but it’s generally the same
- on the far right is a tile menu
- think of this tile menu as a place to put your most used shortcuts to get to them quickly
In this article we’ll be discussing how to customize the tiles in the Windows 10 start menu.
How to Remove Tiles from Start Menu in Windows 10
Your computer probably came with tiles already in the start menu. To customize the Windows 10 start menu let’s first start by deleting the tiles you don’t want. You probably have all sorts of tiles that Windows or your computer manufacturer loaded onto your system. Let’s remove tiles that you won’t use.
To remove tiles from start menu:
- Right click on the tile you want to delete
- Click unpin from start menu
How to Add Shortcut to Windows 10 Start Menu
Now that you’ve removed the tiles you don’t want you have room to add shortcuts to your start menu for programs you actually use.
What types of tiles can you add to your start menu? Tiles for apps, programs and applications you use (whatever you want to call them, they’re all the same thing really). Shortcuts for your favorite internet sites can be added to your Windows 10 start menu as well.
To add a tile to Windows 10 Start Menu:
- Open the start menu
- Find the program you want to pin to the start menu
- When you locate the app you want to add to the start menu, right click on it and select pin to start
- The program will now appear as a tile on the tile portion of your start menu
Go down the program list in the traditional style smart menu and find all the programs you use most. For these programs, pin each one to the start menu for fast accessibility.
Add Shortcut to Start Menu
Did you know you can also pin internet shortcuts to your start menu? If you check your email in a web browser you may want to pin that to your start menu. If you like to shop at amazon you could add an amazon shortcut to your tile menu. Do you have to log into your work website often? Add that internet shortcut to your start menu. And if you love social media you can add shortcuts to Facebook, Twitter, Pinterest, etc to your smart menu in Windows 10.
In previous articles we’ve explained how to add internet shortcuts to your start menu if you use Microsoft Edge, Google Chrome or Mozilla Firefox. The process for each is similar but there’s an important thing to understand.
With each of these instructions you’re pinning the internet shortcut to your start menu. When the shortcut opens, it will open in your default browser.
Here’s how to set your default browser on your computer:
- In the Cortana search box type default browser
- Click on the system settings that says choose a default web browser
- On the right side of the screen in the window that opens (toward the bottom) you’ll see the option to select a default browser for your computer.
Here’s how to pin shortcuts to your start menu in Windows 10. Go to your favorite websites and add shortcuts to them in your start menu using the instructions below.
How to pin Microsoft Edge shortcut to start menu: (see more details in this post)
- Open Microsoft Edge
- Go to the website you’d like to pin to the start menu
- Click the three dots in the upper right corner
- Click pin this page to start
Create a Google Chrome shortcut tile in your start menu: (see this post for more details)
- Open Google Chrome
- Go to the website you’d like to add to the tile menu
- Click on the three dots in the upper right corner of the screen
- Click more tools
- Click add to desktop
- Now minimize or close your Google Chrome screen and right click on the new icon that’s appeared on your computer’s desktop screen
- Click pin to taskbar
Add a Mozilla Firefox shortcut to your start menu: (see this post for more details)
- Open Mozilla Firefox
- Go to the website you’d like to pin to the start menu
- Make the Mozilla Firefox window small so you can see your desktop in the background
- Click on the globe next to the internet address and drag it over to your desktop – this will create a shortcut on your desktop
- Right click on the new shortcut on your desktop
- Click pin to taskbar
Remember, regardless of which browser you used to create these shortcuts, they’ll always open in your default browser.
How to Organize Windows 10 Start Menu
Now that we’ve added our most used content, it’s time to organize the Windows 10 start menu.
Change Tile Sizes in Start Menu
The tiles in your start menu can be different sizes. When they’re first added they’re probably added as the medium size, a square. But, many of these can also be a small square, a horizontal rectangle or a large square.
To change the tile sizes in the start menu:
- Open the start menu
- Right click on the tile you’d like to resize
- Click resize
- Select the size you’d like for your tile
Note: Some tiles have fewer options than others.
Change the size of the tiles in the start menu to suit your style.
How to Add New Column to Start Menu
Now if you’ve added a lot of content to your start menu you may have to scroll down to see it all. I prefer it all to be on the screen at the same time. To be able to view more tiles on your start menu you can add new columns to the menu. When you do this, you can essentially add more shortcuts to the right of your screen instead of having one long column that’s taller than your screen.
How to Add a New Column to Your Start Menu
- Open your start menu
- Click on a tile you’d like to put into a new column
- Drag the tile to the right until a new column forms
- Let go and the tile will stay in the new column
If you have a lot of shortcuts you might want to show more tiles in each column. Doing this will also enable you to see more tiles from the start menu on your screen.
To view more tiles per group:
- Click on the start button
- Click on settings on the left (the gear icon)
- Click on personalization
- Click on start
- Turn on the toggle switch for show more tiles
Create New Group in Start Menu
Now you may have a lot of tiles all bunched together and looking crowded. To better organize your start menu, Windows 10 gives you the capability of grouping your tiles into “groups”.
How to create a new group in start menu:
- Open the start menu
- Click on a tile you’d like to move to a new group and drag it to the bottom
- As you drag the tile to the bottom of the screen to an empty spot you’ll see a horizontal bar appear between the sections of tiles. This bar is the heading for a new group. When you drop the tile a new group will have been formed.
By continuing to drag and drop the tiles around the screen you can rearrange their locations and organize the tiles into groups that are logical. Here are some ideas on groups you may want:
- Utility: computer settings, control panel and windows explorer (in this post we talked about how to get to the control panel in Windows 10)
- Games
- Programs: Word, Excel, Outlook, etc if you’re using Office 365
- Social Media: Facebook, Twitter, etc
- Video: YouTube, Netflix, VidAngel, etc
- Shopping: Amazon, Ebay, Gazelle, Dell, Lenovo
Rename Groups in Start Menu
Now we have organized tiles on our start menu in nice organized groups. Wouldn’t it be nice to give these groups names? Well, you can!
Here’s how to rename groups in start menu:
- If your tile group already has a name just click on the name to change the name
- If your tile group isn’t named, put your cursor on the blank horizontal line above the group and you’ll see a message that says name group. Click when you see that message and you can rename the group.
Conclusion
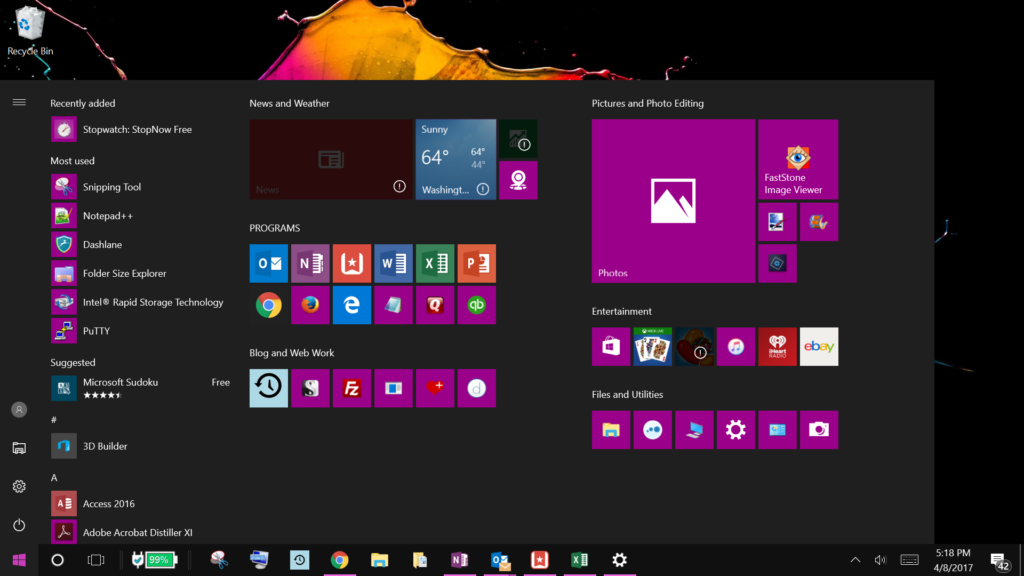
Now that you know how to add tiles, remove tiles, resize tiles, create groups and rename groups in the Windows 10 start menu you can organize your start menu in no time. My only problem is coming up with an layout I like. I keep tweaking it to rearrange tiles. I love things nice and organized and my start menu is no different! Here’s what mine looks like now…leave a snapshot of yours in the comments below, I’d love to see how you organize your start menu.
Thanks for sharing! It’s very useful!
Thanks for stopping by!
Amy
That’s a great article for newcomers to Windows 10. Also goes to show how useful the new start menu is. Good job!
Thanks George. I have found it pretty handy being able to organize all my favorites! 🙂
Amy