In a previous post we explained how to separate names using Microsoft Excel’s text to columns function. But, what if your data is a little more complicated, like an address? In this post we’ll walk you through some more advanced techniques with Microsoft Excel’s text to columns function. We’ll be using Excel 2007 for this tutorial but the concepts are the same for other versions of Excel.

Excel Text to Columns to Separate Addresses
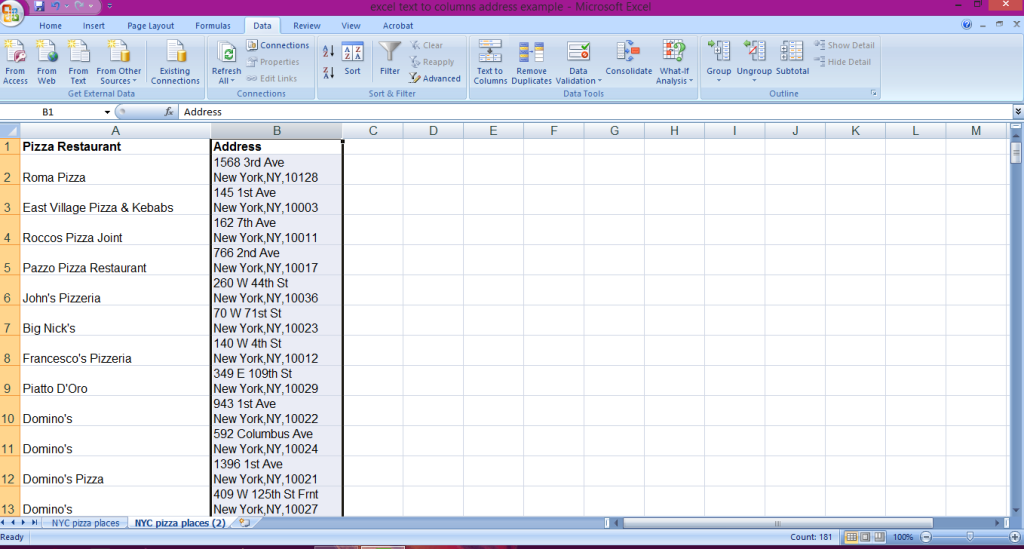
The technique you use to separate your address into multiple columns in Excel will depend on how your information is stored. In this example, the address column was separated into two lines, the street address on the first line and the city, state, zip on the second line.
Separate the Two Lines into Two Separate Columns
- Make sure there is an empty column to the right of the address. In our example our address is in column B and column C is empty so we’re ok. If column C also had data in it we would highlight column C and click on insert from the home menu. That would insert a blank column before column C.
- Select the column with the addresses in it. In our example, column B has the addresses so we would select the entire column by clicking on the letter B at the top of the column.
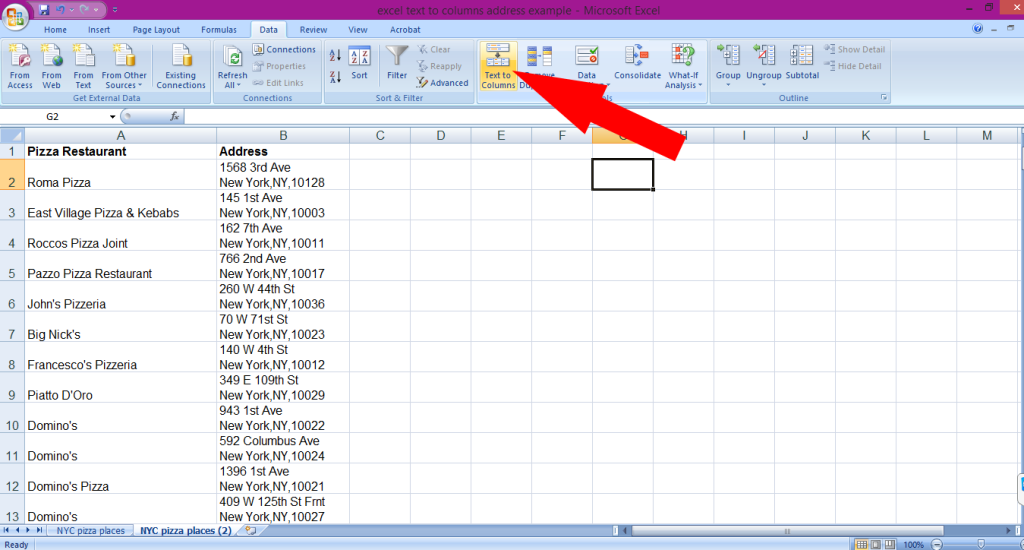
- Select the text to columns function from the data menu.
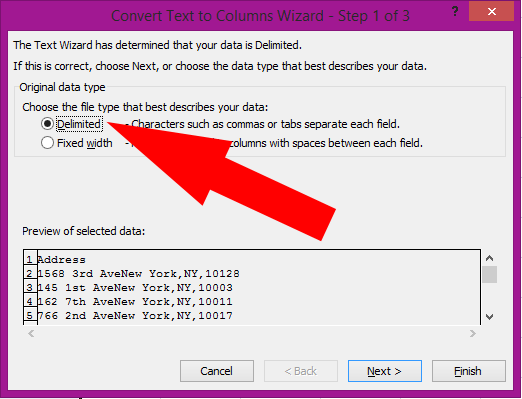
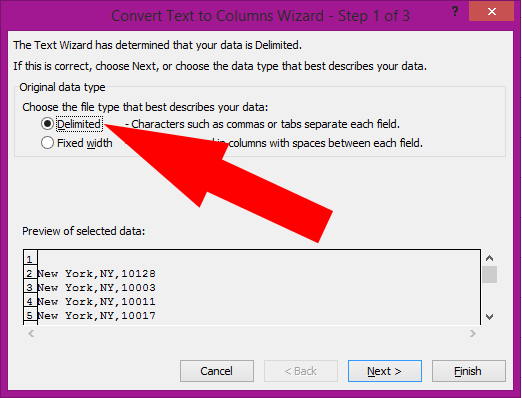
- When the text to columns wizard opens, select Delimited and click Next.
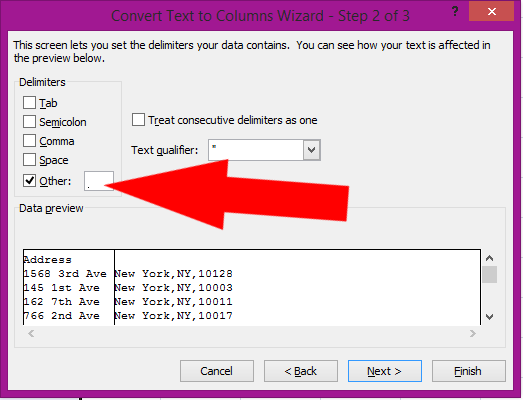
- In the 2nd wizard box uncheck all the boxes except for other. Then, put your cursor in the box next to other and type ALT-010 (in other words, hold the ALT key down and type 010). The box may look empty or have a period in it but if you look below you will see that the data is split into two columns right where it was split into two lines. That’s because ALT-010 is the code for line feed. Click next.
If ALT-010 isn’t working:- When you use ALT shortcuts like ALT-010 above you have to use the numbers in the number pad (to the right of your keyboard). These don’t work with the numbers across the top of your keyboard.
- If you don’t have a number pad then most keyboards come equipped with a NumLock button. Usually you have to press a Function key (Fn) and then NumLock to active a number pad using the keys toward the right side of your normal keyboard. If you enable number lock then type ALT-mjm (the m is 0 with the number lock on and the j is 1 with the number lock on).
- As a last resort, if you can’t find a NumLock button on your keyboard then turn on the on screen keyboard (type on screen keyboard into the Cortana search box). When the keyboard opens, click options and click turn on numeric keypad. Then, press the ALT key and type the 010 in the on screen keyboard.
- The last box of the text to columns wizard allows you to define the type of data in your resulting columns. We don’t need to do anything in this box so click finish.
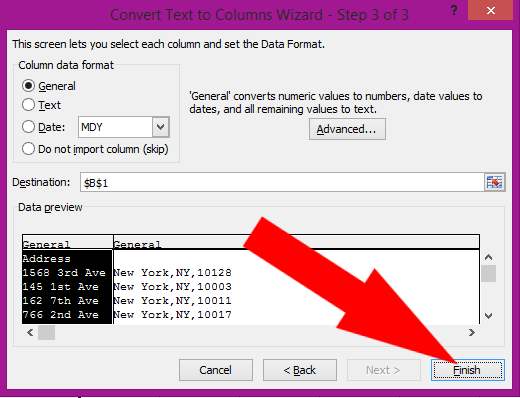
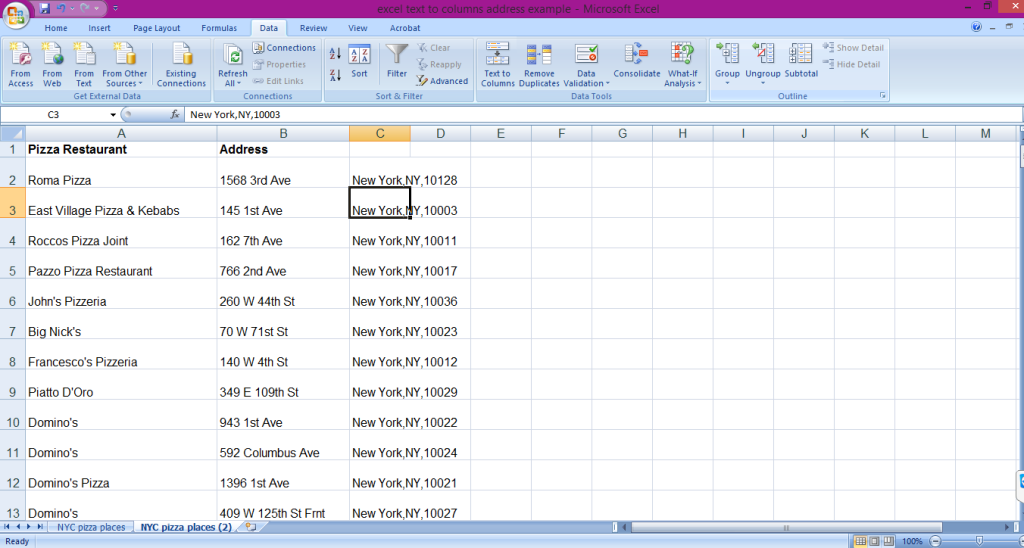
- Your address will now be split into a street address column and a city, state and zip column.
Separate the City, State and Zip into 3 Columns
Now say we want to sort our data by state or filter out only certain cities. That will be easier if the city, state and zip were each in their own column. There are several ways to do this. Here’s one way:
- Since we’re going to take our city, state and zip column and separate it into three columns we need to make sure we have two empty columns to the right of the city, state, zip column. In our example we do so we’re all set. If we didn’t have two empty columns we would select the column to the RIGHT of our city, state and zip column and click insert on the home menu two times. This would insert two empty columns.
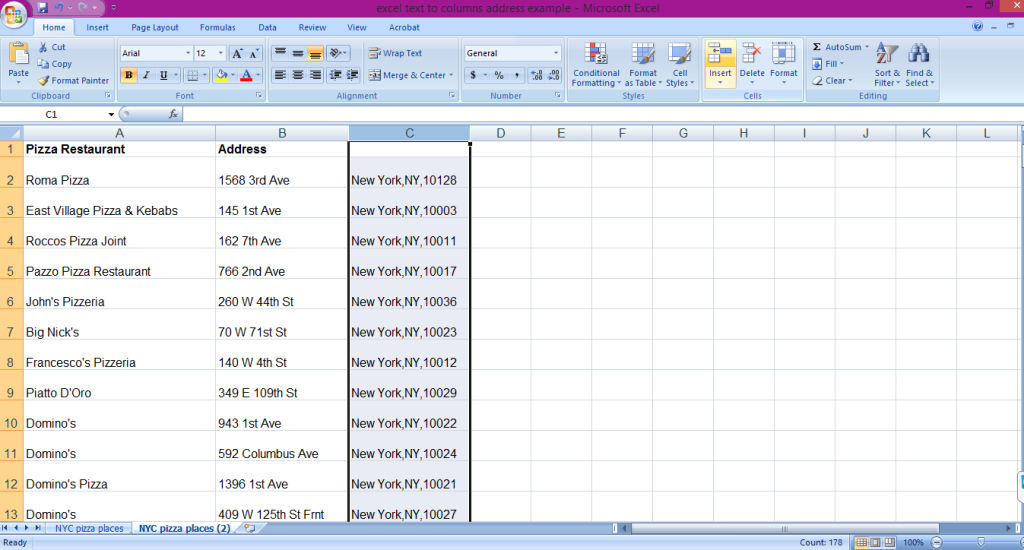
- Now, to separate the city, state and zip, highlight that column by selecting the letter at the top of the column and select text to columns from the data menu.

- Again, when the text to columns wizard opens, select delimited from the 1st window and click next.
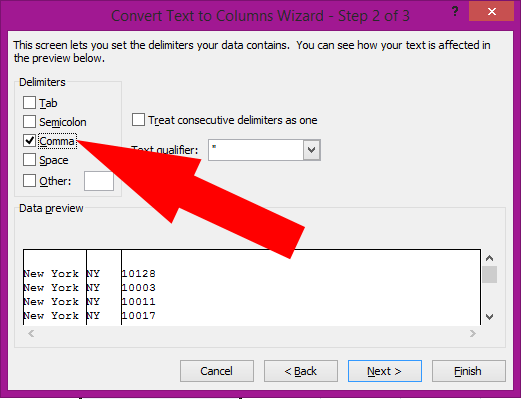
- Our city, state and zip are separated by commas so in the 2nd box of the wizard we’re going to uncheck every box except for the one that one next to the comma. Then, by looking at the data in the bottom of the window we can see this will separate the city, state and zip exactly the way we wanted so we click next.
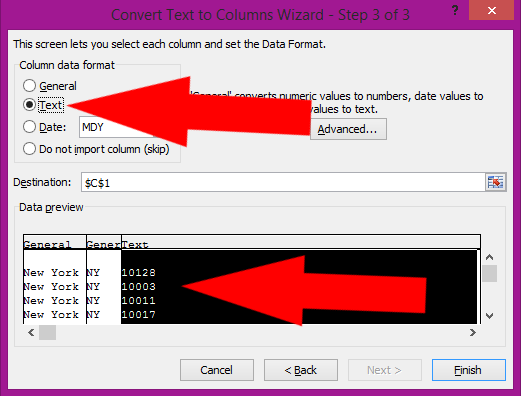
- This time, in the 3rd box of the wizard we are going to identify a data type. We’re going to identify the data type for the zip code column. This is because if we don’t Excel may assume these are numbers and cut off any zeros in the beginning of the number. So, a zip code of 01234 would only show up as 1234 and cause problems. So, in this box we’ll highlight the zip code column at the bottom of the window by clicking in it and at the top we’ll select text. This will force Excel to store the zip codes as text instead of numbers. Then we’ll click finish.
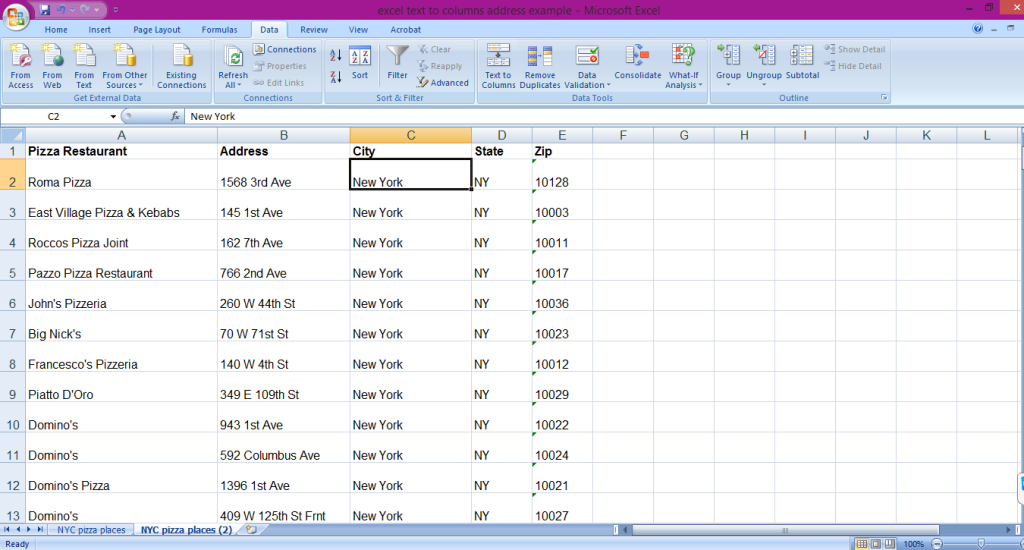
- After adding some titles to our new columns are spreadsheet is all set and ready to go with the addresses split into appropriate columns for sorting or doing mail merges.
Again, depending on how your data is structured you may have to play around with the delimiters you select in step 2 of the text to column function but the preview at the bottom of that window should help you make sure you select the right combination for your data. Or, if you get stuck, feel free to leave a comment below and we’ll help out.
Conclusion
Separating out the address components into separate columns will make it easier for you search your data, filter it and/or complete mail merges for printing envelopes or labels.
Hello, I read your tutorial and followed the instructions but my text is not so neat and wont separate out perfectly. Some street addresses are longer than others e.g. sometimes part of the street address is in the suburbs, etc.
It is also not separated by commas rather a space. Is there a way to create columns easily for these types of addresses?
Holly,
Unfortunately, depending on the formatting they can sometimes be tricky.
Try using the space character as the delimiter in the text to columns wizard.
There are other ways of getting the data out using formulas. For instance, if you address is in cell A2 and if they are US addresses with a comma then state and zip at the end you may be able to use these formulas to extract some parts of the address:
state: =LEFT(RIGHT(A2,LEN(A2)-FIND(“,”,A2)-1),2)
zip code: =RIGHT(A2,LEN(A2)-FIND(“,”,A2)-4)
The street and cities can become trickier (as you probably can see) because a street can have 2 or 3 words separated by spaces and a city could be multiple words so they don’t all follow a nice pattern.
Hopefully using some of these formulas and trying the space as the delimiter can get you closer to your desired end result.
Amy
the ATL-010 is not working for me. It doesn’t do anything I can hear a ding when I enter it. any thoughts?
Hi Trish,
The ALT-010 works when you type the numbers on the numberpad (to the right of the keyboard). If you have one of those, use that for the numbers.
Are you working on a laptop? If you are and don’t have a numberpad then usually there’s a number lock on the keyboard somewhere. You usually have to press a Function key and the number lock to turn it on. It then turns some of the letters and numbers into a numberpad. If you have this, then you would turn on numlock and then type ALT-mjm (m would replace the 0’s and j would replace the 1).
As a last resort, if you don’t have a NumLock button on your keyboard anywhere then you can usually turn on an on-screen keyboard. Type “on screen” keyboard into the Cortana search box (in Windows 10) and open the app that appears at the top. If you click options in the on screen keyboard you can turn on the number pad. Then, you can use these numbers for your shortcut.
Thank you for the question as this may be something others are running into as well so I’ll update the article to include these instructions. Let me know how it works!
Amy
Hey,
Thank you for sharing with us!
The simplest way to Merge cell I used, is by using merge and center tool which is on the toolbar or the another way I used, is by using the controls in the alignment tab of the cell dialog box.
But I haven’t try this method thanks for the post I definitely going to try this.
Microsoft Excel Training recently posted…5 Powerpoint File Management Practices To Keep
This is really helpful for beginners.
I hope so.